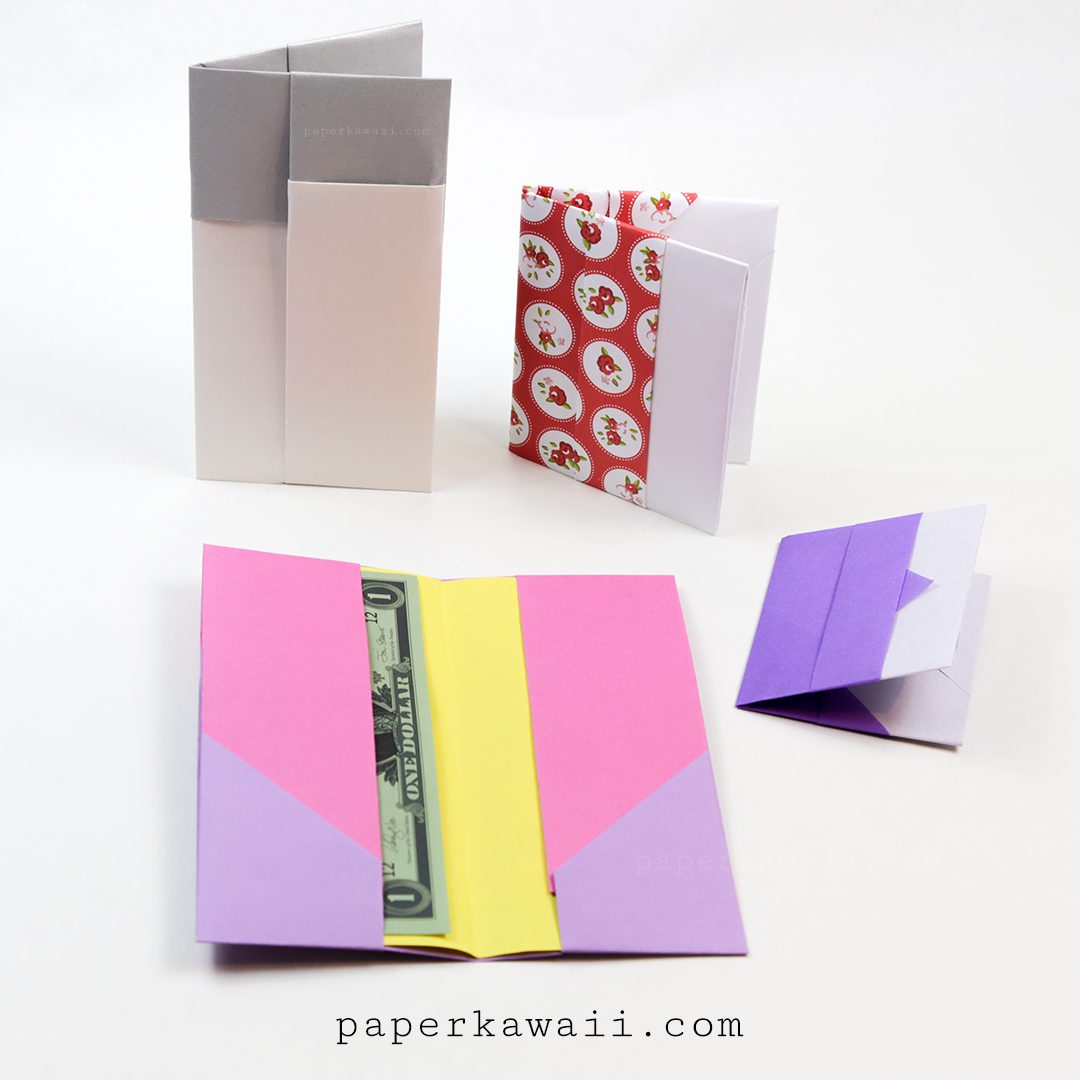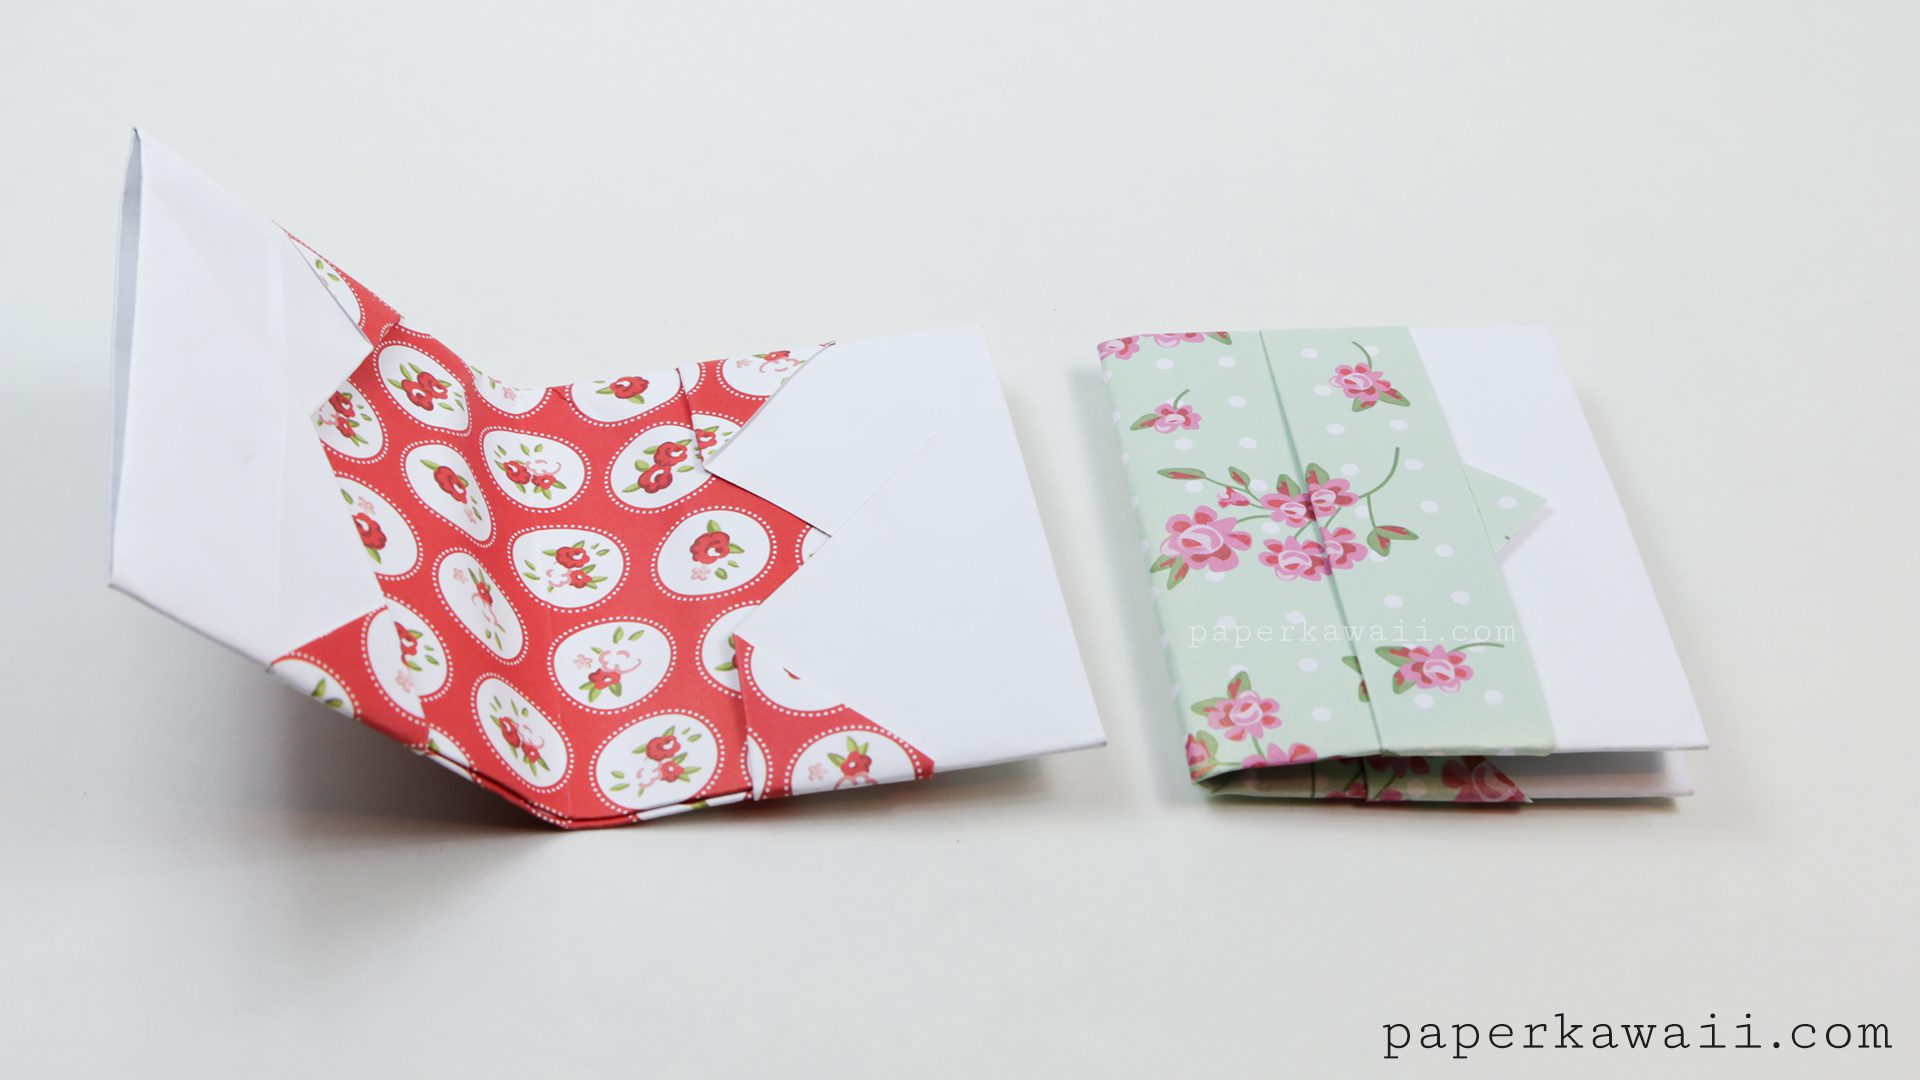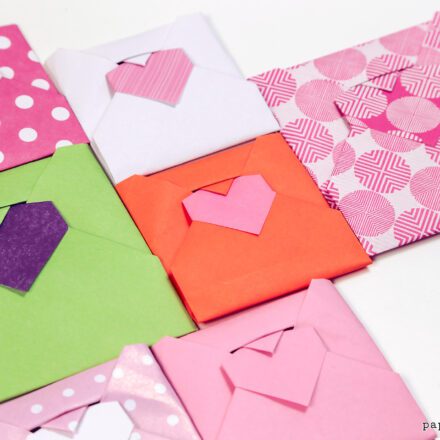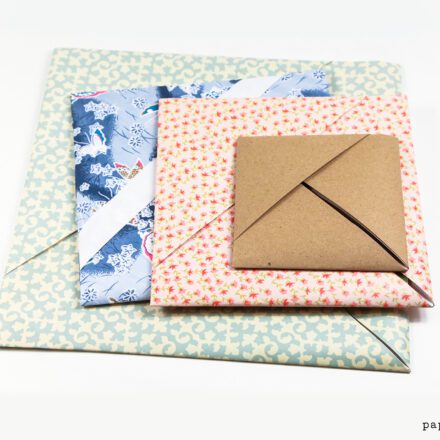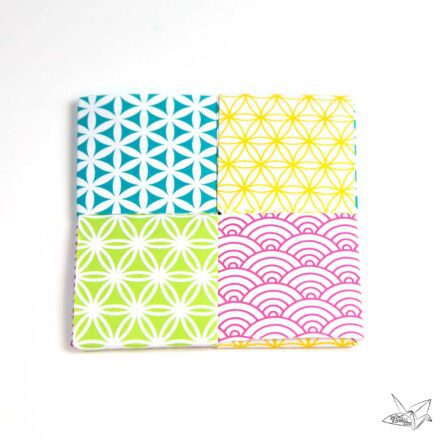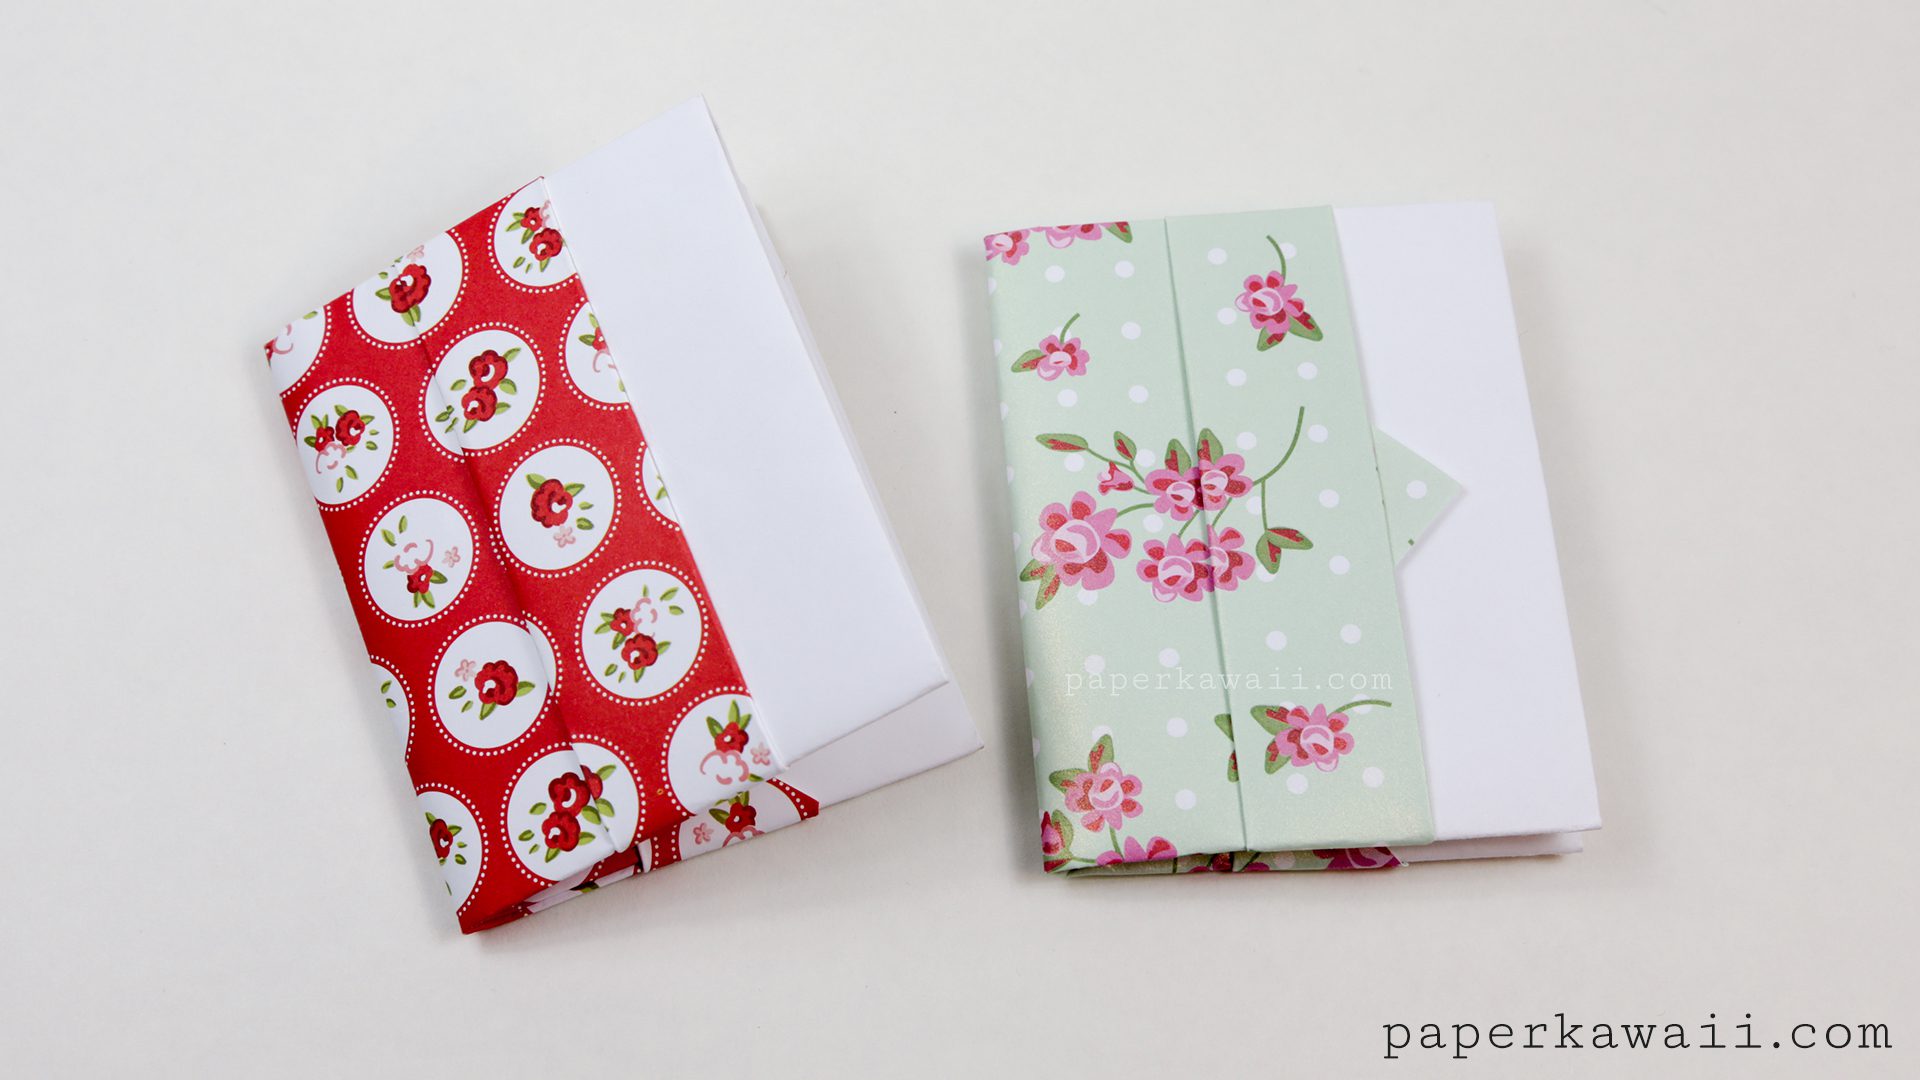
Learn how to make a really pretty origami card wallet which holds credit cards, business cards or other card size things.
You can also use this to store other stuff, some ideas are: keep sewing threads and needles inside, use this as a greetings cards and have special notes in each pocket, use as a place-card holder, stand it up on it’s side so that you can put the card in the front flap.
If you use paper with a texture, this will be a lot more sturdy and usable. You don’t need to use any glue, and you can also make this origami card wallet using fabric.
You can choose to have the little triangle flap or not, and you can also customise the position and width of the front flap.
Design: Traditional model, but instead of starting straight, starting diagonal.
Level: ★★☆☆☆
You will need:
– 1 sheet of square paper. I used 9.75 x 9.75 inches / 25 x 25 cm.
The ones at the start are using 30 x 30 cm thick paper and fit credit cards loosely.
A Photo Tutorial is available on the Origami Photo Tutorials page.